Teeth Whitening with Enlighten


If you follow along with me on my Instagram stories you may have seen me start my teeth whitening journey a couple of months ago. Fast forward to now and my journey is complete and I want to take you through my experience showing you the before/afters and everything in between.
I used the Enlighten treatment and as a full disclaimer, it was a gifted treatment in return for an honest review on my blog. The dental practice I went to was the Harley Street Dental Studio in London.

The Enlighten teeth whitening system is widely acknowledged as the most effective whitening treatment in the world and it’s the only system to guarantee Vita Shade B1 with a 98% success rate. That’s impressive results. It works by increasing the tooth's permeability to oxygen which breaks down stain molecules. What I was really impressed by as well was the low sensitivity promise as I’d heard a lot of teeth whitening products can be painful, but Enlighten products remain PH neutral when in use meaning less sensitivity as well as long lasting results.
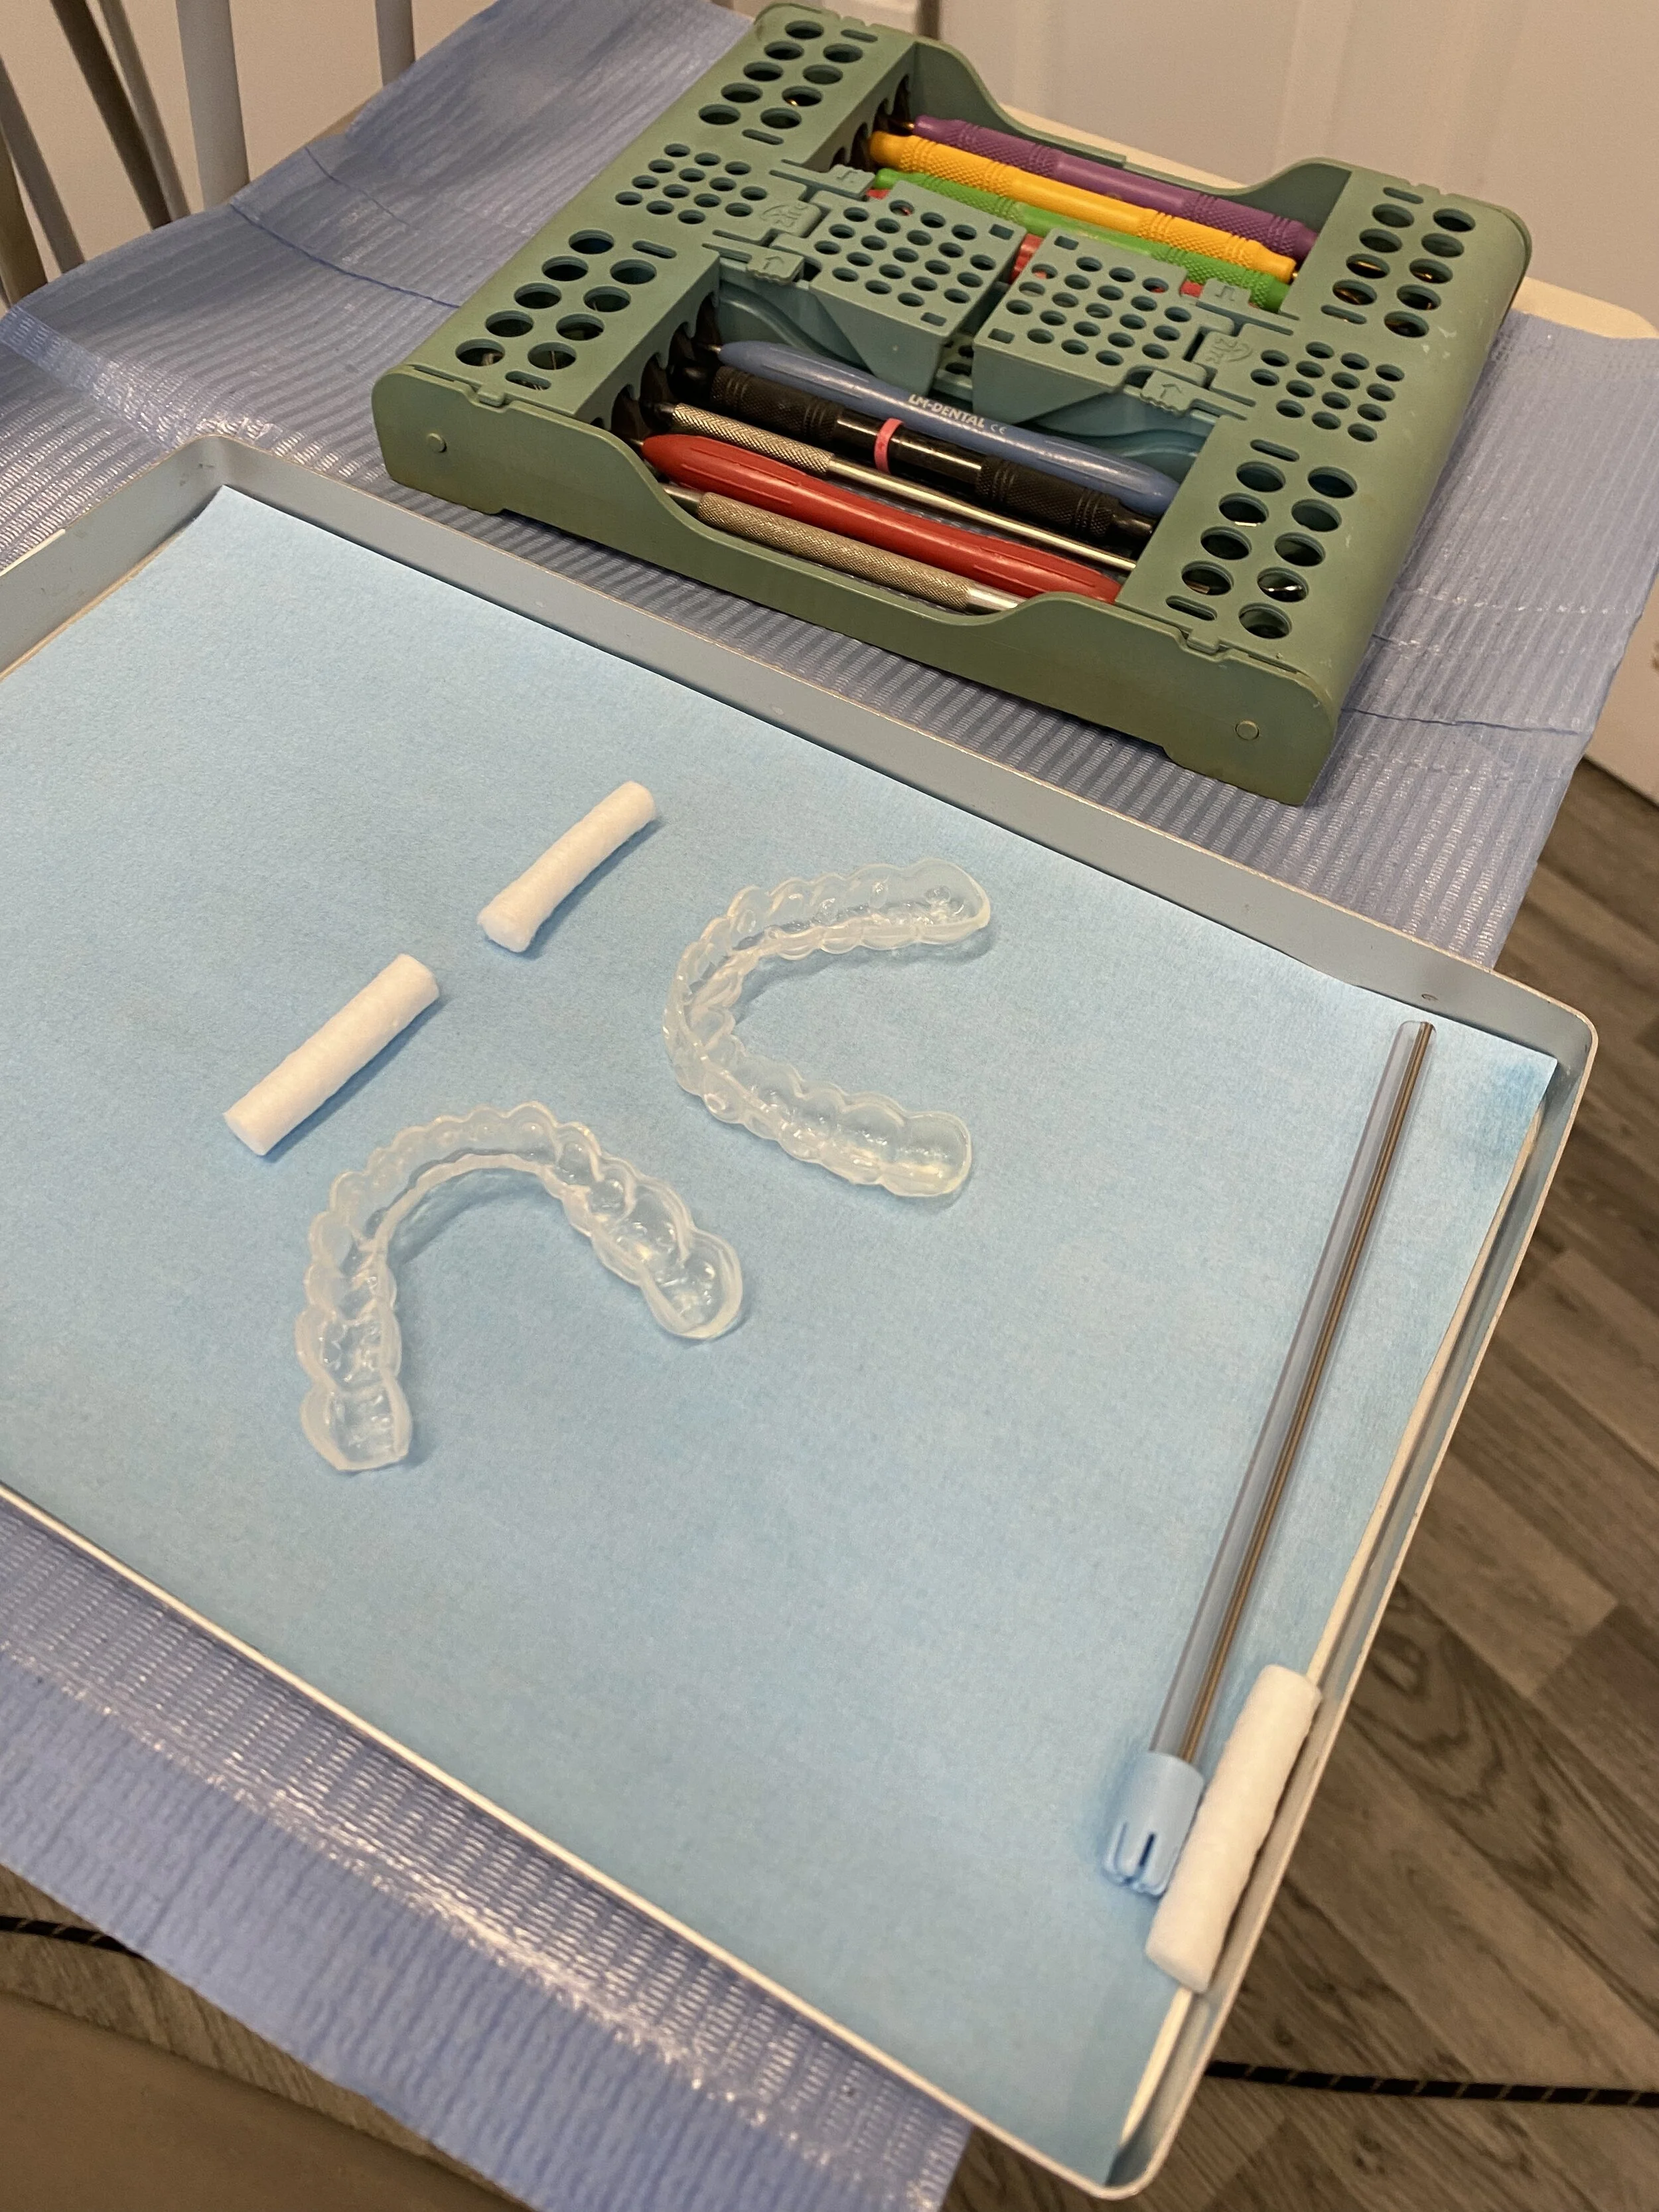
I first visited Harley Street Dental Studio back in May when they scanned my teeth to make the trays. The scanning procedure was amazing and it ensures extremely accurately fitting trays which can lead to a higher level of bleaching. The scanning took minutes and then the dentist took before photos of my teeth so that we could compare the end results a couple of weeks later.


A week later it was back to the dentist to have a good clean with the hygienist to ensure my teeth were as clean as possible before my treatment. By then my trays had been made and the hygienist showed me how to fit them and talked me through the Enlighten at home treatment. I was given a box with two syringes full of the bleaching gel. The 1st syringe was for the first 7 days and has a 10% active ingredient and the second week was the green gel which had 16% active ingredient. The pack also included a pack of desensitising swabs which could be used if you have particularly sensitive teeth. Each swab contains a single dose of desensitiser and you just rub over any sensitive areas before fitting the trays. I was also given a tooth serum toothpaste to use during the 14 day treatment and then follow up with the Eva-White toothpaste to help maintain my white smile.
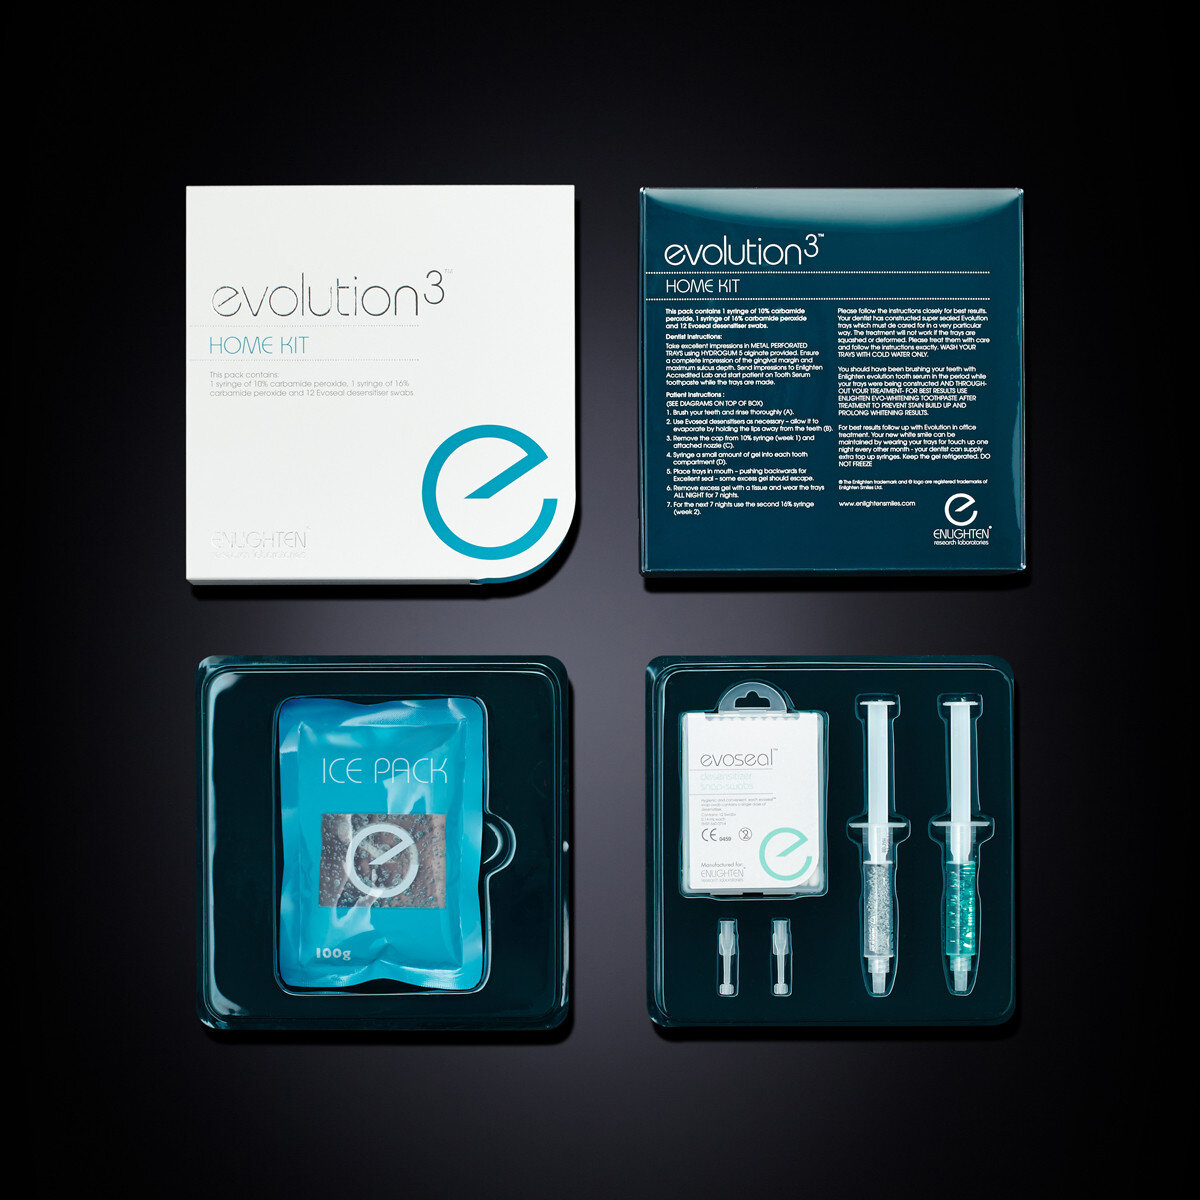


The gels needed to be refrigerated at all times, so when I got home I put them straight in the fridge until night time. That first night I was a bit nervous about getting everything right, so it took a bit of time. But the process is actually really simple and after a few nights it took just minutes. For the first 7 nights I put a pea size amount of gel from the first syringe in the trays at the front of each tooth. I made sure my teeth were as dry as possible by wiping with a tissue, then used the desensitising swab before fitting the trays as I have a bit of sensitivity on a few of my front teeth. Once the trays were in, I wiped any excess from my gums and went to bed. I thought, it might be really uncomfortable and weird to sleep in, but because the trays were made to fit my teeth so precisely, I hardly noticed they were in and they didn’t affect my sleep at all.


In the morning, I took the trays out, rinsed with water and stored in the handy box provided. One thing I have to mention is that you don’t have to follow any particular diet while undergoing the treatment. So you can still drink tea, coffee and red wine. Still eat curry or whatever else you desire and there is nothing you need to avoid! Yippee!
I continued with the same treatment for 7 nights, making sure the gel was stored in the refrigerator at all times. Then after 7 days, I switched to the green gel, which had a stronger amount of Carbamide Peroxide in it. Again, I did the same night time routine for 7 days, and then on the 15th day I went back to the dentist for the final 1 hour power whitening treatment. I needed to remember to take my trays with me as while In the chair, a whitening agent was applied to my teeth using my trays. This in-chair session lasted an hour and was completely painless.


I couldn’t believe the end results. My teeth were sparkling white and I was so happy with my smile. I have always hated my teeth after having a bike accident in my teens when all my teeth were knocked upwards into my gums, and after years of tea drinking and spicy food eating, the stains were getting out of control. Also, the fact that my gums are starting to recede with age, it just made me very self conscious of my smile and consequently, I tried to avoid smiling with my teeth and would often cover my mouth with my hands while smiling.
But now, I can’t help smiling and showing off my teeth. They look absolutely amazing and completely natural. The Enlighten results also last indefinitely with not much effort. All I need to do to keep up my brilliant white smile is to wear the trays with the gel for one night every two months for the 1st year then every four months for the 2nd year and every six months for the third year.
I will also continue to use the tooth serum toothpaste and evo-white toothpaste daily. As long as I keep the syringe refrigerated, it lasts a year in the fridge.

The Enlighten Smiles treatment costs between £400 - £600 but considering the results and that it lasts, it’s so worth it. Especially if you are self conscious about your teeth like I was. Also it’s worth asking your dentist if they offer payment plans, as many dentists will offer this to help spread the cost.
I would highly recommend the treatment and am so so happy with the results. You’ll now see me smiling all over Instagram because, this smile needs to be seen!
Have a great weekend everyone and if you have any questions about the treatment, just get in touch.
Anna x